Effect by effect
Aconite ships twelve effects: Chorus (8 models), Phaser, Delay (3 voicings), Multi-tap delay (with per-tap tempo sync), Reverb (Plate / Room / Hall), Tape, Distortion (5 modes), Bit-crusher, Compressor (4 topologies), Transient designer (Single / Multi / Curve), EQ (6 type-selectable bands), and Stereo Imager. This chapter covers each one: what it’s for, its key controls, and its hero visualization.
For how the rack chain works as a whole (enabling slots, reordering, insert vs send), see Using the FX rack.
Chorus
Section titled “Chorus”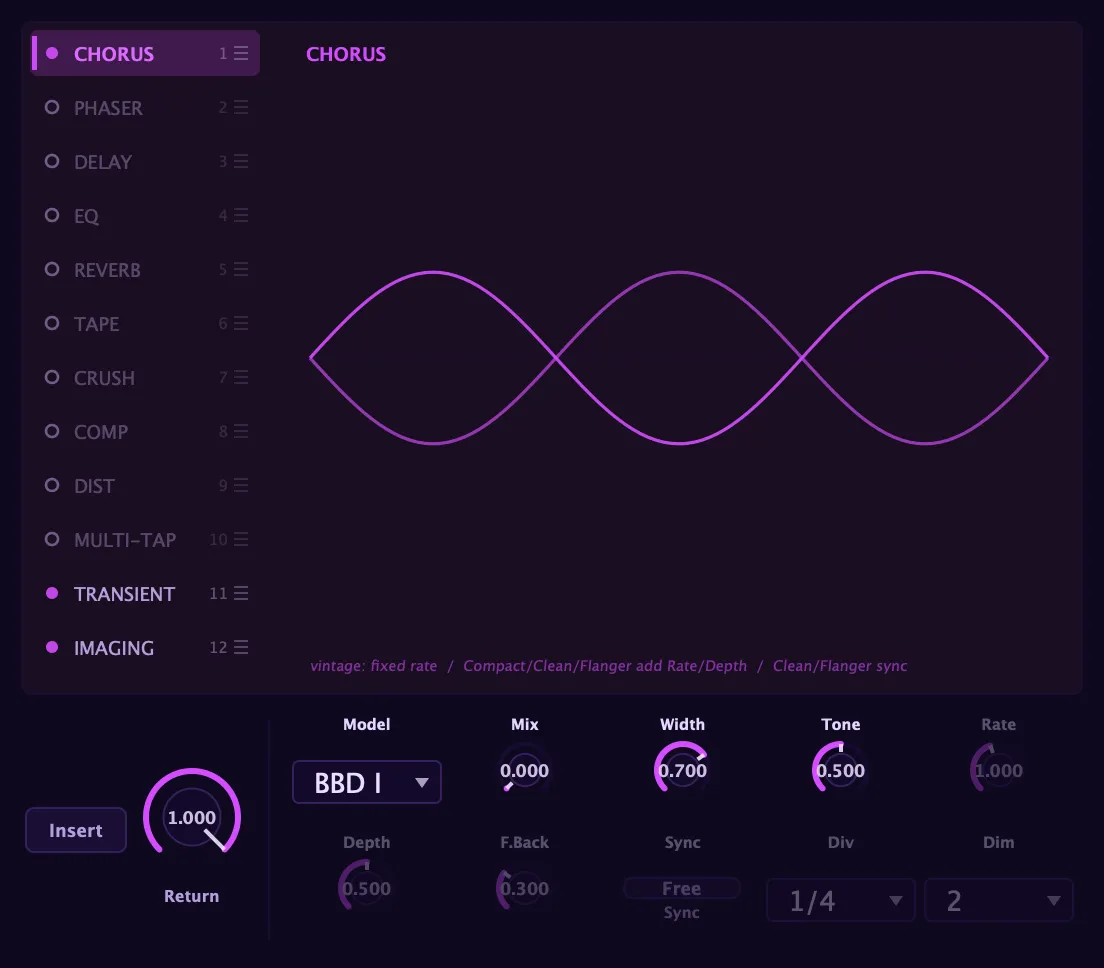
Eight distinct models, each voiced after a specific classic rather than one generic engine with a relabelled knob. You pick a model and the controls reorganise to show only what suits it: there is no clutter from knobs that don’t apply.
BBD I and BBD II capture bucket-brigade delay character: a soft companding saturation and a warm reconstruction low-pass give repeats a gentle, slightly rounded quality. BBD I+II layers both. Ensemble is a rich, multi-voice string-section style based on classic ensemble chips. Spatial widens the image without obvious pitch modulation, and gives you a four-way Dim Mode selector that steps through tonal and depth presets for quick, decisive choices. Compact is a classic single-line chorus with its own Rate and Depth. Clean is a transparent, pristine chorus. Flanger uses a short delay line for a metallic, resonant comb sweep; feedback sharpens it to a hard jet effect.
Both Clean and Flanger add a Feedback knob. All models support tempo sync via a Sync toggle and Division selector.
The chorus slot is a direct-manipulation editor rather than a bank of knobs (the same house style as the EQ and reverb). Its hero draws the chorus’s own motion, and it is model-aware: the animated wave follows the selected model’s LFO shape, its opposed-versus-shared phase, and how many voices it runs, so you see the character of the model you picked. Below the hero, a comb band-rail runs over a live spectrum of the real signal passing through, so you shape against what is actually playing.
A Band window (drag the rail’s edges) scopes the chorus to a frequency range: everything below the low edge and above the high edge stays dry, and only the band between them is chorused, so you can shimmer the highs while the low mids stay solid. Open it fully and the whole signal is chorused as before. It is the same Band scope the phaser and bit-crusher carry.
When the Band is scoped, an EDGE chip sets how sharply its walls fall off: Gentle (6 dB per octave), Medium (12 dB per octave), or Steep (24 dB per octave, the default). Steep confines the chorus tightly to the band; Gentle lets it bleed softly past the edges. The picture matches the sound: the comb fades at the band edges by exactly how much the chorus reaches there. The chip lights only while the band is scoped.
A Low Protect crossover (on by default) keeps the bass out of the chorus so the low end stays solid and defined while the modulation works above it: drag its edge to set the frequency, or switch it off to modulate the whole range.
Key controls: Model, Mix, Width, Tone, Rate, Depth, Feedback (Clean / Flanger), Dim Mode 1 to 4 (Spatial), Sync + Division, Band (low / high edge), Band Slope / EDGE (Gentle / Medium / Steep), Low Protect.
Phaser
Section titled “Phaser”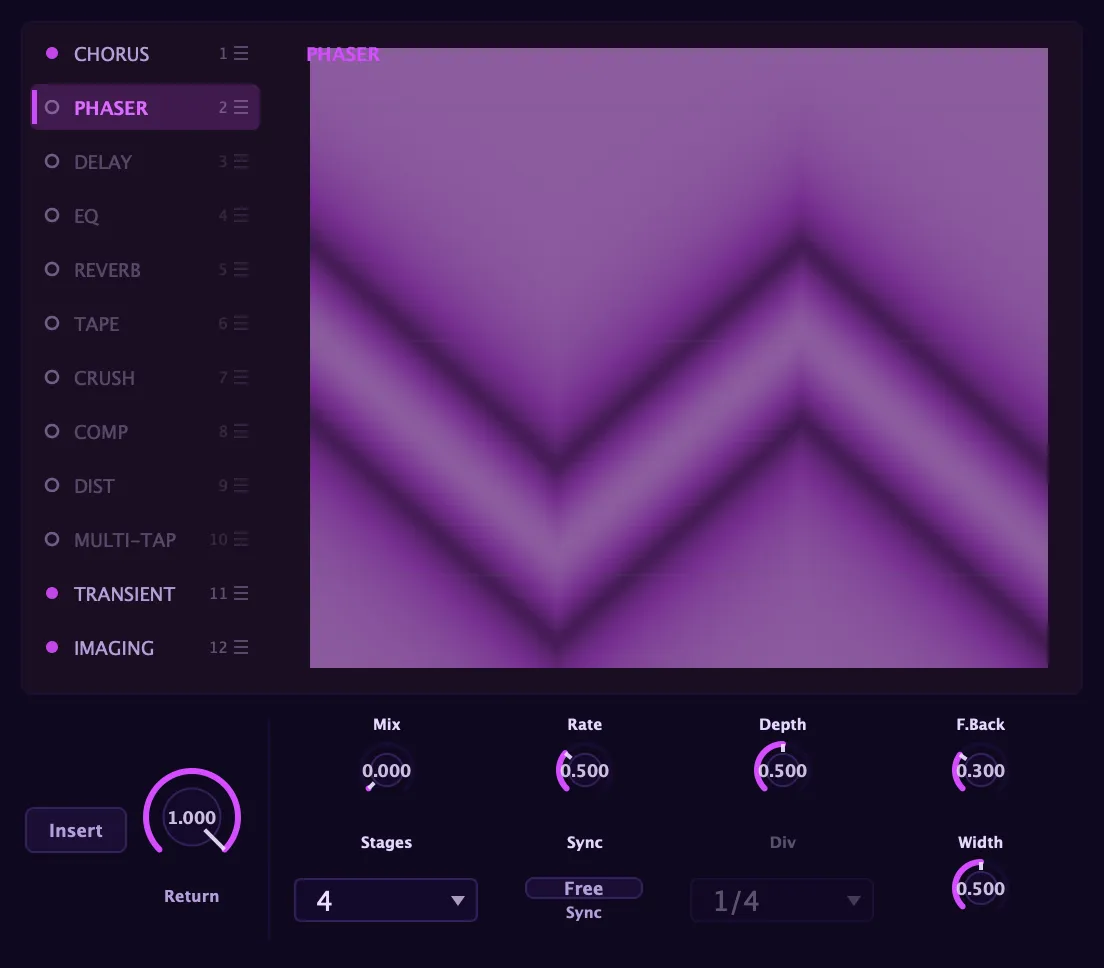
A cascade of all-pass stages swept by an LFO, summed against the dry signal to produce a comb of moving notches. As the LFO sweeps the notch positions, you hear the characteristic whooshing sweep: silky at low feedback, sharp and nasal with feedback turned up.
Feedback controls how pronounced the notches are: low values give a transparent, wide sweep; high values make the peaks and notches ring out. Stages sets the number of all-pass sections (2, 4, 6, or 8): more stages mean more notch pairs and a deeper, more complex sweep character. Width applies a per-channel LFO phase offset to open the stereo image.
A Band window scopes the sweep to a frequency range: drag its edges (they ride as a full-height overlay on the notch-comb) to sweep only the mids, say, while the extremes stay clean. Open it fully and the notches sweep the whole spectrum as before. It is the same Band scope the chorus and bit-crusher carry.
As on the chorus, an EDGE chip sets how sharply the scoped band’s walls fall off: Gentle (6 dB per octave), Medium (12 dB per octave), or Steep (24 dB per octave, the default). The notch-comb fades at the band edges by how far the sweep actually reaches there, so the display matches the sound. The chip lights only while the band is scoped.
A Low Protect crossover (on by default) holds the low end clear of the moving notches, so the sweep colours the mids and top while the bass stays clean: drag its edge to set the frequency, or switch it off to sweep the full range.
Key controls: Mix, Rate, Depth, Feedback, Stages (2 / 4 / 6 / 8), Width, Sync + Division, Band (low / high edge), Band Slope / EDGE (Gentle / Medium / Steep), Low Protect.
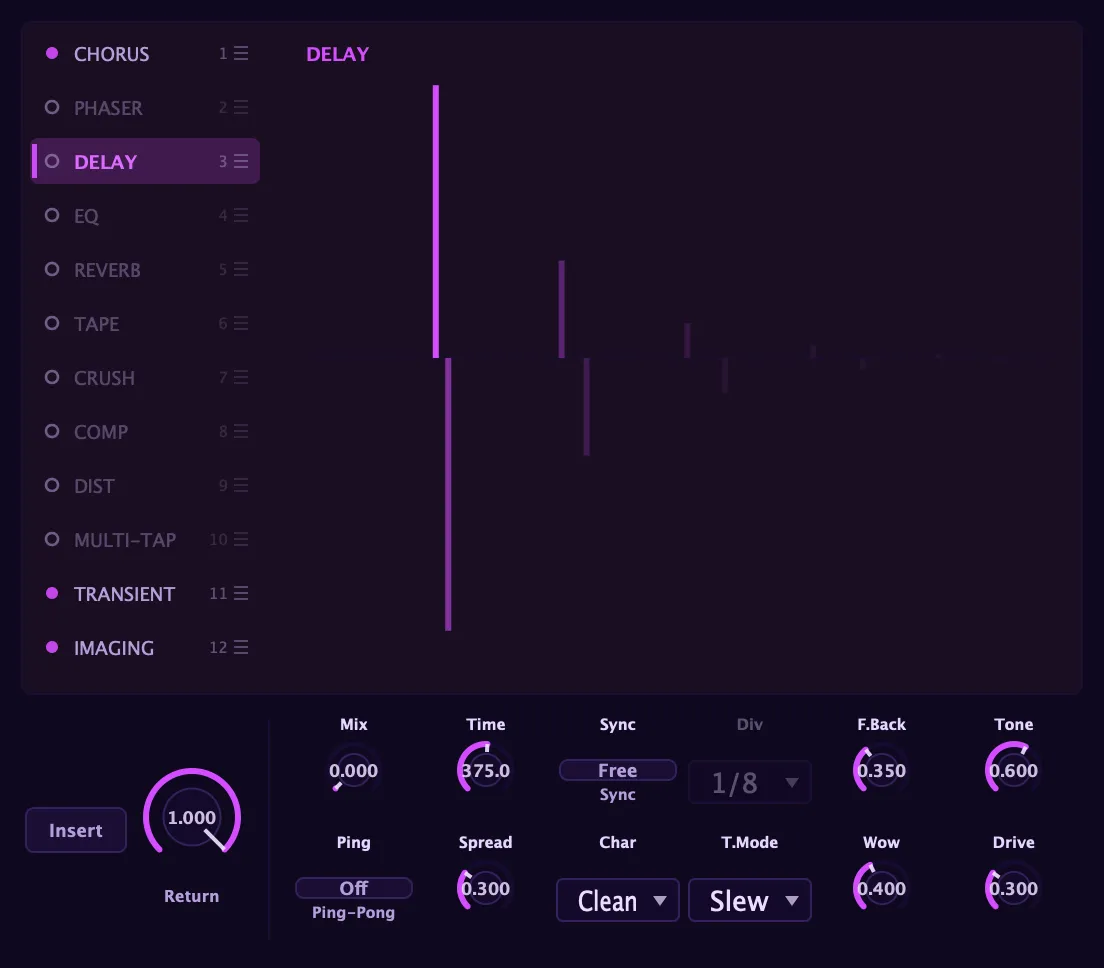
A stereo delay with smooth, pitch-correct time adjustment and three character voicings.
Clean is a transparent digital delay: repeats at exactly the level you set, with no added colour. Tape adds wow and flutter for a drifting, organic quality, applies saturation inside the feedback loop so repeats warm up as they accumulate, and adds a head-bump lift in the low end. BBD models bucket-brigade character: companding compression, dark reconstruction filtering, and a feedback high-pass so repeats thin out as they decay: classic analogue multi-repeat.
When you change the delay time, you choose how it behaves: Slew pitches the repeats up or down as time shifts (the tape-machine pitch glide), while Crossfade changes seamlessly with no pitch artifact. Tone damps the feedback path, darkening repeats as they decay. Ping-pong bounces echoes across the stereo field. Spread sets the stereo width of the echo itself.
Key controls: Mix, Time, Feedback, Tone, Spread, Ping-pong, Character (Clean / Tape / BBD), Sync + Division.
Multi-tap delay
Section titled “Multi-tap delay”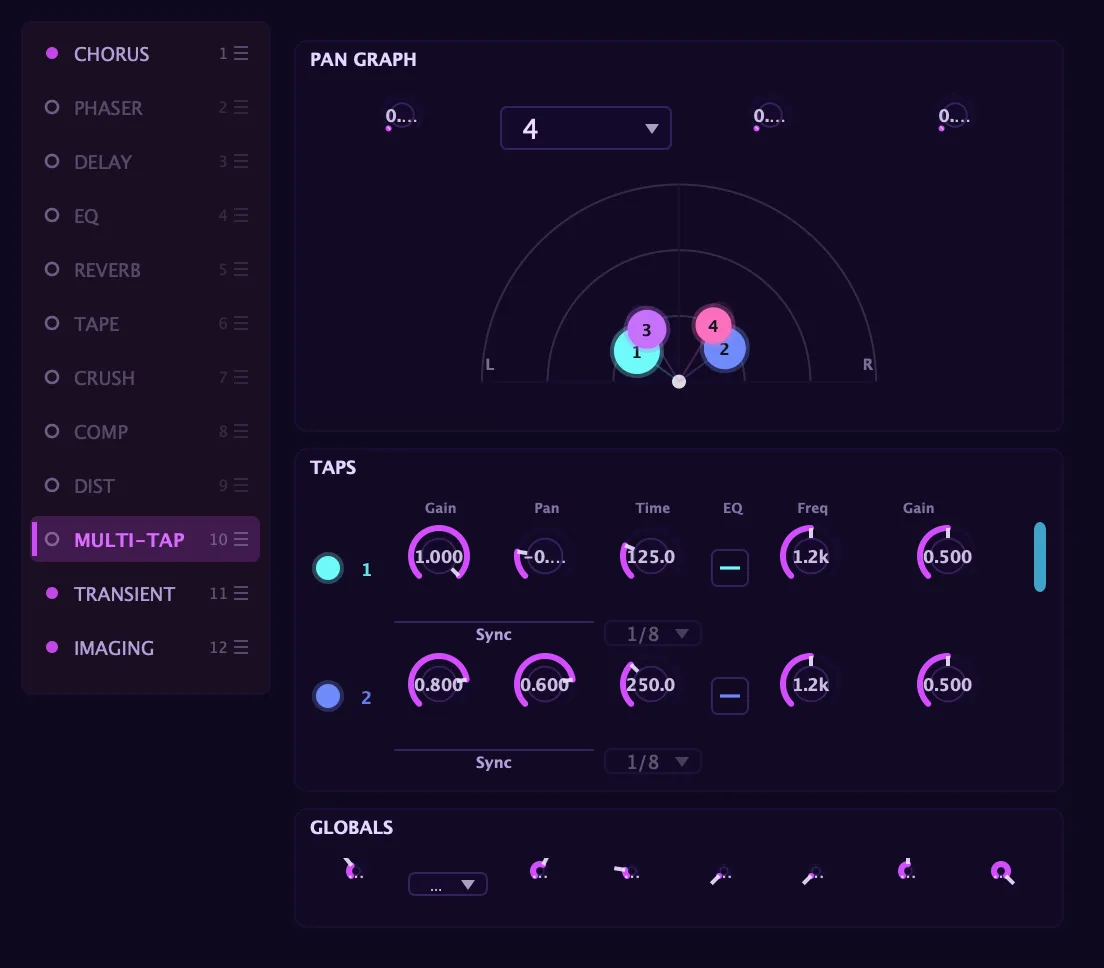
A rhythmic multi-tap delay that reads up to six independent taps off one delay line. Each tap has its own time, level, pan, and three-band EQ, so you can sculpt a complete rhythmic pattern where each repeat lives at its own place in the stereo field with its own tonal character.
A dedicated feedback tap sits separately, with its own time, gain, pan, and EQ. It controls the regeneration independently from the main taps, letting you dial in exactly how the pattern repeats and decays. Feedback can regenerate from the dedicated tap alone or from the summed output of all taps, auto-normalised so adding more taps doesn’t send the feedback runaway.
Per-tap tempo sync works independently: each tap can run free (in milliseconds) or lock to a note division of the host tempo, so a syncopated multi-tap pattern can lock precisely to the grid. Rotate sweeps the pans of all taps together for a spinning, animated stereo image. Delay mod adds subtle pitch drift to the taps. A Direct dry send and Output makeup sit alongside the main mix.
Feedback high-pass thins the feedback path so low-end energy doesn’t accumulate with each repeat, so long regenerating patterns stay open and clear rather than building into a muddy rumble.
The hero visualisation is a semicircular pan graph that plots each tap by its time and pan around a half-disc: you can see the rhythmic pattern and stereo spread at a glance, with per-tap editing rows below.
The UI limits this effect to insert: it is not offered as a send/return.
Key controls: Mix, Taps (1–6), Feedback, Tone, Feedback high-pass, Feedback mode (Tap / Normal), rotate rate/depth, delay-mod rate/depth, Direct, Output; per tap: Time or Sync + Division, Level, Pan, Enable, EQ type / frequency / gain; feedback tap: Time or Sync + Division, Gain, Pan, EQ.
Reverb
Section titled “Reverb”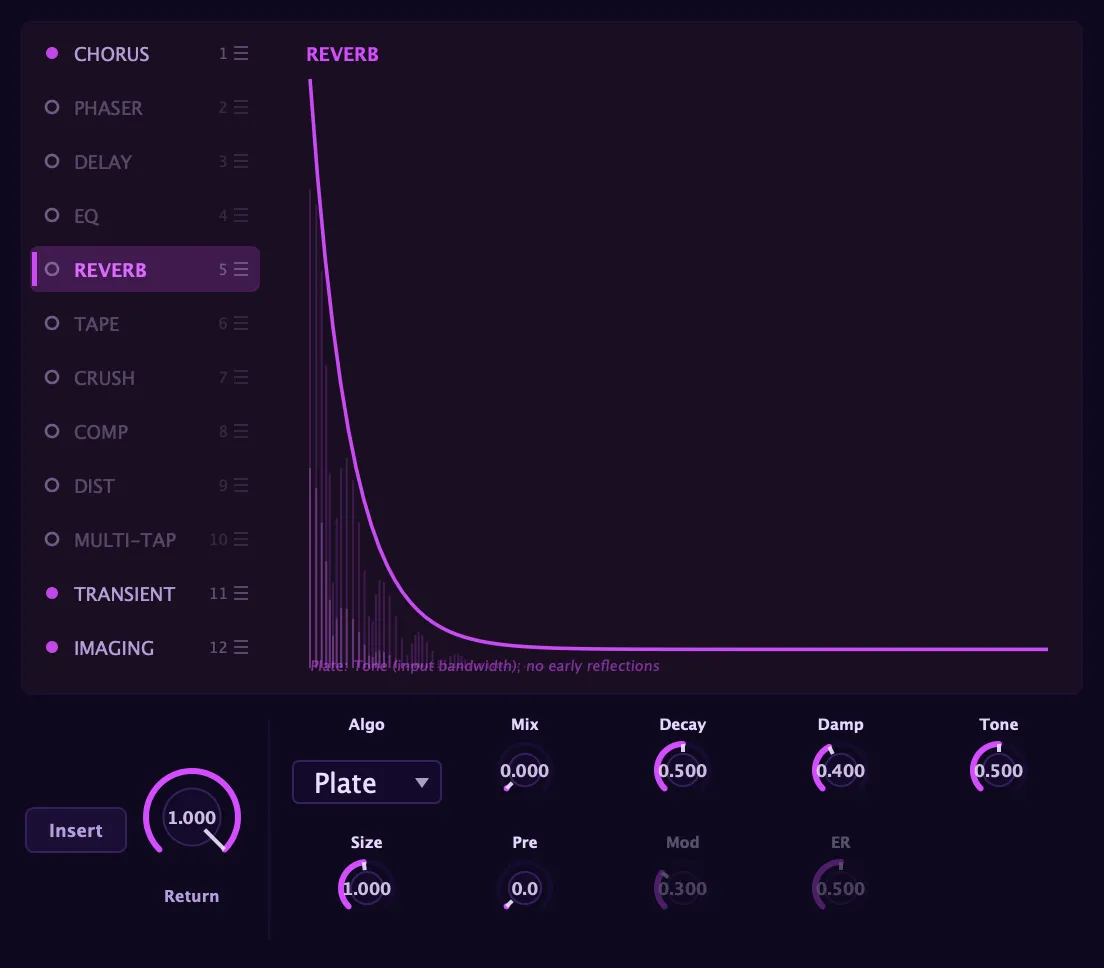
One reverb with three algorithms, each suited to a different acoustic context. Plate produces a lush, dense, diffuse tail, the kind of reverb most people hear when they think “reverb.” Room is a feedback-delay-network room with a subtle shimmer. Hall is a large concert-hall wash with prominent early reflections and warm, frequency-dependent decay that naturally darkens at the tail; it is the algorithm the sound takes the longest to decay on. Pick one from the segmented Algo switch (Plate / Room / Hall).
Near-maximum Decay on any algorithm yields an effectively infinite tail: the reverb becomes a pad in itself, sustaining long past any note you play. Pre (pre-delay) pushes the reverb onset back in time, keeping the dry attack clean before the room opens up.
The Amount Canvas — how much reverb, per frequency. The reverb’s FX-slot view is not a bank of knobs. Its hero is an editable amount canvas: a curve across the frequency spectrum that sets how much reverb each band gets. Pull a band down to keep those frequencies dry (a solid, un-washed low end); push a band up to make them bloom into the tail (an airy, singing top). The tail’s length is unchanged: you are shaping how much of each frequency is sent into the reverb, not re-EQing the wet signal. Behind the curve runs a live dry/wet spectrum so you shape against what is actually playing.
- Split and merge bands. The canvas starts as a single amount region and you can split it into as many as five bands, each with its own depth, dragging the crossovers to decide where one band ends and the next begins. Merge them back down when you want a simpler shape. The bands and their edges travel with the patch.
- Per-band movement. Each band also carries its own modulation amount: dial it up and that band’s reverb send drifts gently over time (a slow, breathing swirl on just the highs, say, while the body stays still). A global Move rate sets how fast that movement runs.
- Solo and mute a band. Each depth band has S and M chips in the popout: solo one band to audition just its wet depth (the rest go dry), or mute a band to drop it, so you can hear exactly what each region contributes.
- Low Protect. A crossover (on by default) holds the bass out of the tail so a big wash never muddies the low end. It shows as a frosted zone with a padlock on the amount canvas: click the lock to toggle, drag the edge to set the frequency.
The no-knob chip macros. Below the canvas, a row of chips holds the reverb’s character controls with no dedicated knobs: Mix, Decay, Damp, Tone, Size, Pre, Move, and ER (early-reflection level). Grab a chip and drag to set it.
The fullscreen editor. A small glyph in the corner of the slot pops the reverb out into a large, resizable window for detailed work. The popout gives the amount canvas a full frequency frame: a keyboard note-ruler across the top, dB gutters down the sides, a frequency ruler along the bottom, and L/R in and out meters so you can see the reverb’s level at a glance. Alongside the per-band DEPTH and per-band MOD editing, the popout exposes an early-reflections zone (Model / Diffuse / Level / Pre) and a space zone (Decay / Size / Mix / Damp / Tone / Move / Swirl), giving the whole reverb room to breathe without leaving the effect.
Like the EQ, transient designer, bit-crusher, and imager, the reverb follows Aconite’s no-knob / direct-manipulation house style: the display is the control.
Key controls: Algo (Plate / Room / Hall), amount canvas (per-band depth, 1–5 bands via split/merge, per-band Solo / Mute), per-band modulation, Low Protect, Mix, Decay, Damp, Tone, Size, Pre, Move, ER; popout: early-reflection Model / Diffuse / Level / Pre, space Decay / Size / Mix / Damp / Tone / Move / Swirl.
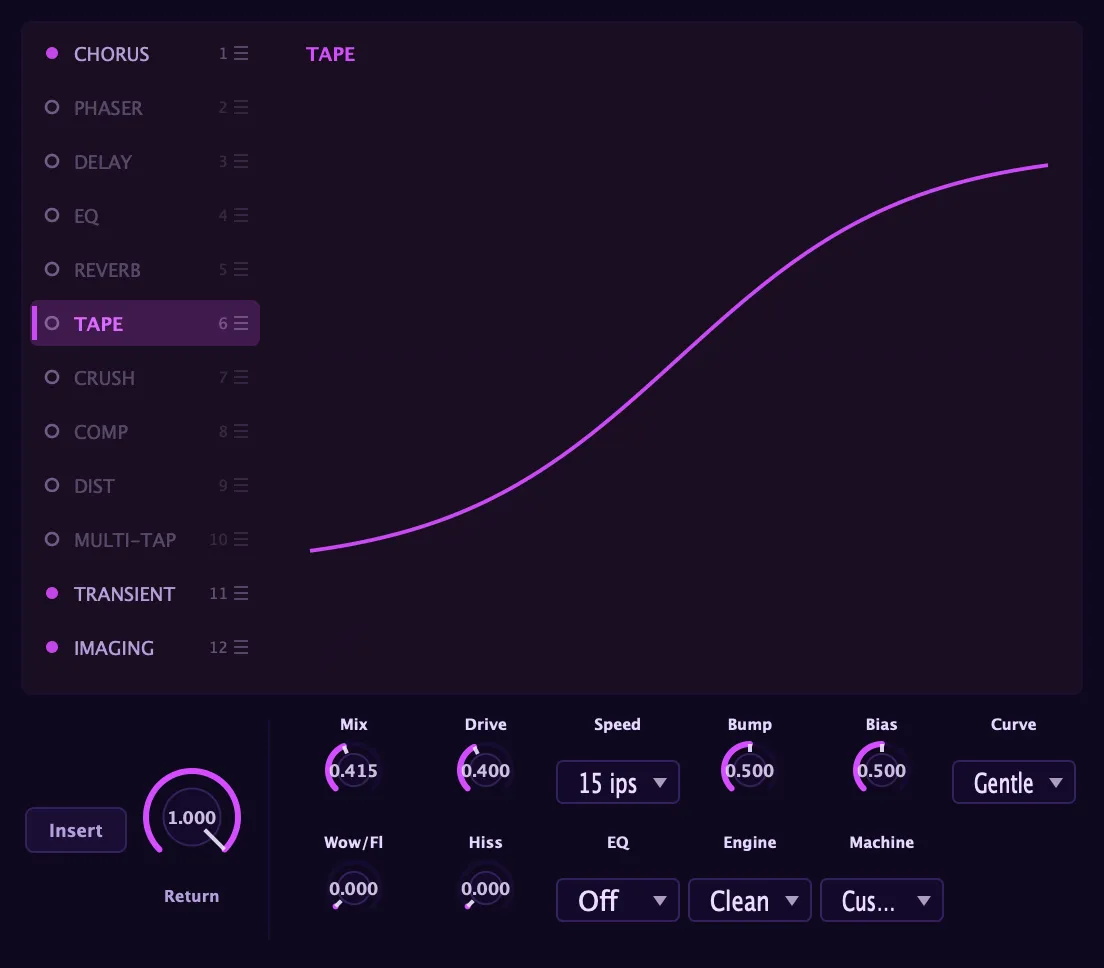
Tape saturation and character, with controls that go well beyond a single warmth knob. The heart of the effect is the Engine switch: Clean applies a fitted soft-clip saturation curve that captures the gentle harmonic profile of tape without modelling every physical detail: ideal when you want warmth without CPU overhead. Authentic engages a hysteresis model and physics-based head loss, which responds more dynamically to transients and captures the way real tape compresses and saturates differently at the core versus the surface.
Speed (7.5, 15, or 30 ips) sets the character of the tape machine: slower speeds produce deeper wow and flutter and a higher hiss floor; faster speeds are cleaner and tighter. Character switches between a gentler or more aggressive saturation curve. The Reproduce EQ applies the standard playback equalization curves: NAB for a warmer, low-end-lifted sound, and IEC for a brighter, more open response. Switching it off leaves the frequency response flat.
Additional controls shape the analogue physics: Bump raises the low-end head resonance, Bias shifts the tape’s operating point for subtle colouration, Wow and Flutter add the pitch drift characteristic of mechanical transport, and Hiss sets the hiss floor. Machine profile selects between voicing presets based on different machine characters.
Key controls: Mix, Drive, Speed (7.5 / 15 / 30 ips), Engine (Clean / Authentic), Character (Gentle / Aggressive), Bump, Bias, Wow, Flutter, Hiss, Reproduce EQ (Off / NAB / IEC), Machine profile.
Distortion
Section titled “Distortion”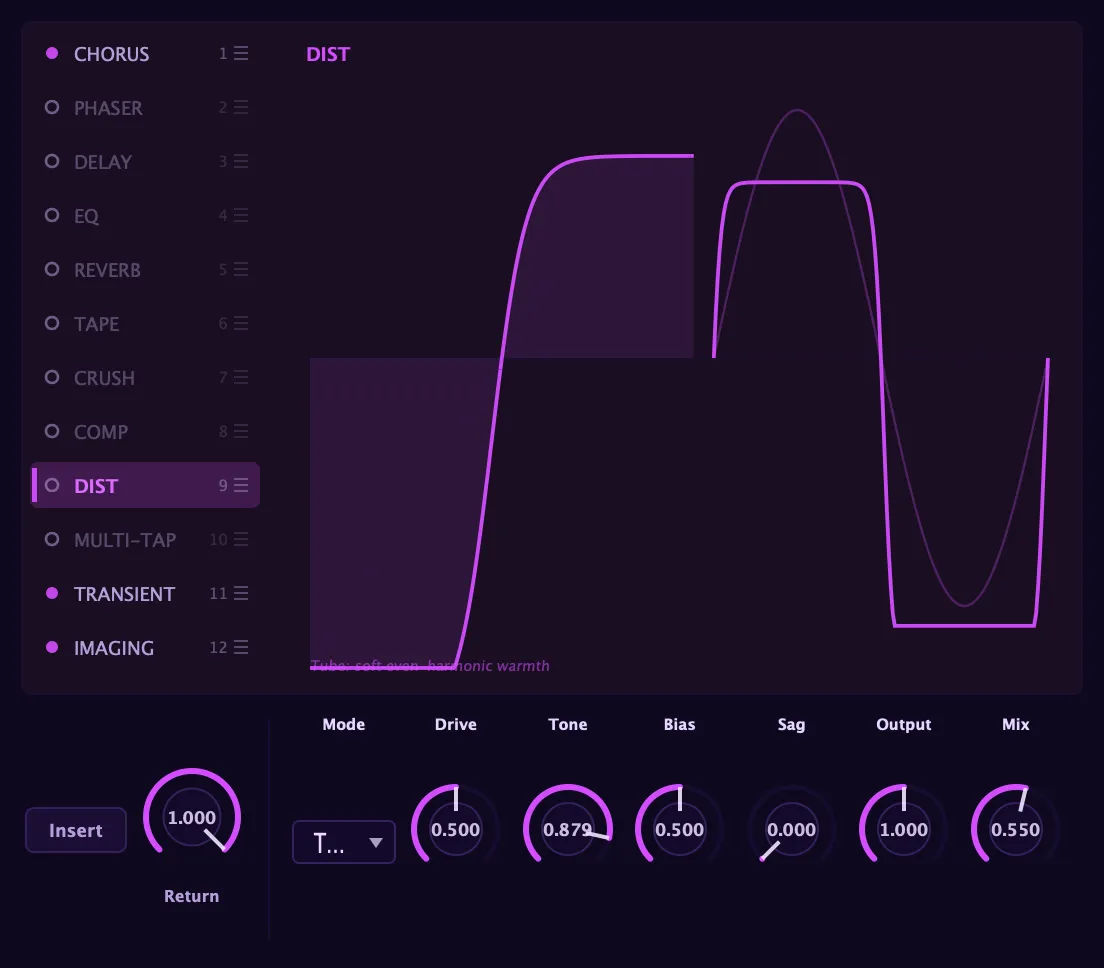
A front-and-centre overdrive and distortion unit with five distinct clipping modes. Each mode is a voiced pedal chain, not just a relabelled curve: it carries its own pre- and post-emphasis EQ so it responds like the real circuit it is modelled on. Drive pushes the signal into the mode-selected chain; Tone tames fizz at the top; Output sets the post-distortion level after any makeup.
Each mode has a different harmonic character:
- Tube: warm asymmetric soft-clip, emphasising even harmonics for a thick, musical overdrive reminiscent of a pushed tube amp. Its bias breathes with your playing dynamics, so the even-harmonic warmth swells as you dig in.
- Transistor: aggressive hard clip, rich in odd harmonics, more abrasive and cutting than Tube.
- Diode: a true Tube-Screamer voicing: a mid-hump before the clip and a rolled- off top after it give the classic overdrive-pedal bark, slightly asymmetric, that cuts through a mix while keeping articulation.
- Fuzz: full Big-Muff-style staging: cascaded soft-clip stages with a mid-scoop between them push toward a near-square wave with the dense, thick harmonic content of a germanium or silicon fuzz.
- Octave: a full-wave rectification that shifts the fundamental up an octave and produces a cocked-wah-style tonal character.
Shared shaping controls sit alongside the mode:
- Bias injects a DC offset before the clipper, unbalancing the positive and negative half-cycles and introducing even harmonics on any mode.
- Symmetry sets the Diode’s up-vs-down clipping asymmetry (its two-up-one-down knee), a different kind of asymmetry from Bias that shapes the Diode voicing’s grit.
- Sag models the power-supply rail collapsing under load: the amp breathes and compresses dynamically with the signal level, the way an overdriven amp behaves when it runs out of headroom.
- Starve is the Fuzz gate: it chokes and spits the decaying tail, the Fuzz-Face splutter you get when a dying fuzz circuit runs out of current.
Multiband: split into up to five bands. The distortion is also a multiband engine. A Bands control splits the signal into one to five frequency bands with phase-coherent crossovers (the bands sum flat, with no comb notches at the seams) and drives each band independently. Every band carries its own Type (Tube / Transistor / Diode / Fuzz / Octave), its own Drive, and its own crossover frequency, so you can keep the lows warm and clean, fuzz the mids, and bite the top through a diode voice, all in one patch. The shared shaping controls (Bias, Symmetry, Sag, Starve, Tone, Output, Mix) apply across every band. At one band (the default) it is exactly the single-band unit above.
Per band you also get audition and level control: Solo an individual band to hear just its drive, Mute a band to drop it, and Trim its output level, plus a global Amount macro that scales every band’s drive together. A Protect Lows option sums the lowest band clean and in parallel so heavy distortion never muddies the bass. Each band carries its own noise gate (Threshold + Range, with shared Attack / Hold / Release) keyed off that band’s own content, so band hiss is silenced before the drive amplifies it.
The no-knob editor — the display is the control. Like the reverb and EQ, the distortion’s face is a direct-manipulation editor rather than a knob grid. A compact in-slot view shows an editable per-band drive canvas over a live IN-vs-OUT spectrum (the shaded gap between the input and the distorted output is exactly the harmonics the distortion adds), with a focused-band transfer-curve inset that reacts to Drive and Bias. A corner glyph pops it into a fullscreen editor that adds the character knobs, per-band Solo / Mute / Trim, the gate zone, and Output.
Key controls: Drive, Mode (Tube / Transistor / Diode / Fuzz / Octave), Tone, Bias, Symmetry (Diode), Sag, Starve (Fuzz), Output, Mix; Bands (1–5) with per-band Type / Drive / crossover / Solo / Mute / Trim / gate, global Amount, Protect Lows.
Bit-crusher
Section titled “Bit-crusher”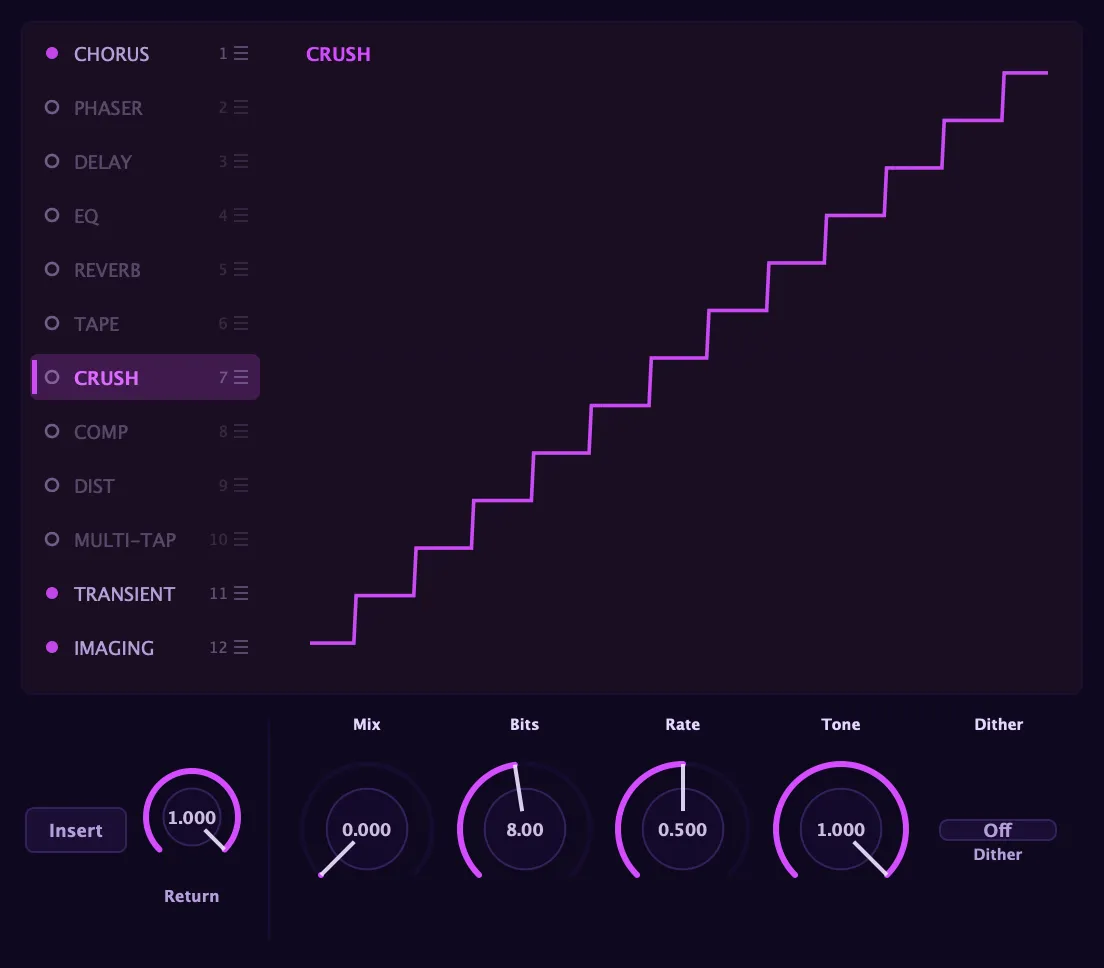
Two independent lo-fi operations that you can engage separately or together, now made frequency-conscious so you can crush a band and keep the rest of the signal pristine.
Bit-depth reduction reduces the word length of the signal down to around one bit at the extreme end. The result is a stepped, gritty, aliased texture: subtle at 14–15 bits, obvious and aggressive below 8. A Quant choice sets how the quantizer straddles zero: Mid-tread keeps a code right at zero so silence stays silent (the musical default), while Mid-riser centres the steps across zero, so at one bit it snaps to a hard centred square, the most extreme “true one-bit” tone.
Sample-rate reduction is a sample-and-hold decimator that drops the effective sample rate, generating aliasing deliberately for the character. Unlike most anti-aliasing in the signal path, this aliasing is the point: the staircase artefacts and foldback produce the crunchy, digital lo-fi texture of early samplers and video game sound hardware. A Jitter control perturbs the resample clock: at zero the downsample clock is perfectly periodic for a cleanly digital alias set, and raising it loosens the clock for a grittier, less-periodic, vintage-sampler character.
Crush a band, keep the rest. A draggable Crush Band decides which frequencies the crush actually touches. Everything below the low edge and everything above the high edge passes through completely clean, and only the band between them is crushed, so you can grind the mids while the sub stays solid and the air stays pristine. Set the band wide open (low edge at zero, high edge at the top) and the whole signal is crushed as before. The clean shoulders and the crushed band sum back together exactly, so narrowing the band never loses signal, it only decides what gets the treatment.
Filter places an anti-imaging low-pass relative to the crush. Post (the default) is a gentle de-imaging roll-off after the crush that tames the harshest imaged top; Pre is a steeper roll-off before the crush for a clean alias-free-below-rate lo-fi mode; Off removes it entirely for the rawest result. The corner tracks the Tone control in every case.
Dither trades the raw quantization grit for a smoother noise floor. Off keeps the correlated buzz (the default). TPDF adds triangular dither that smooths the quantization buzz into a steadier, noisier lo-fi. Shaped noise-shapes the error so the quantization noise is pushed up out of the mids and out of the way.
A gentle post Tone control rolls off the harshest top end when the aliasing gets too aggressive, so you can keep the crunch without the ice-pick frequencies.
The no-knob editor — the display is the control. Like the EQ and transient designer, the bit-crusher has no rows of knobs. A time scope draws the crushed staircase over a ghost of the input, both from the real audio playing through the effect, so you watch the crush bite into what you actually hear. The Crush Band sits on a draggable spectrum rail: grab its edges to set which frequencies get crushed. A paired Bits / Rate header sets depth and rate together, and a chip row along the bottom holds Tone, Jitter, Filter, Quant, Dither, and Mix. Its Insert/Return routing row stays put so you can run it in line or as a send.
Modulation. Rate, Mix, and Jitter join Bits and Tone as mod-matrix destinations, so an LFO on Rate gives rhythmic sample-rate wobble, an envelope on Mix fades the crush in with each note, and a slow LFO on Jitter drifts the alias character over time.
Key controls: Mix, Bits (1–16), Rate, Crush Band (low / high edge), Jitter, Filter (Post / Pre / Off), Quant (Mid-tread / Mid-riser), Dither (Off / TPDF / Shaped), Tone.
Compressor
Section titled “Compressor”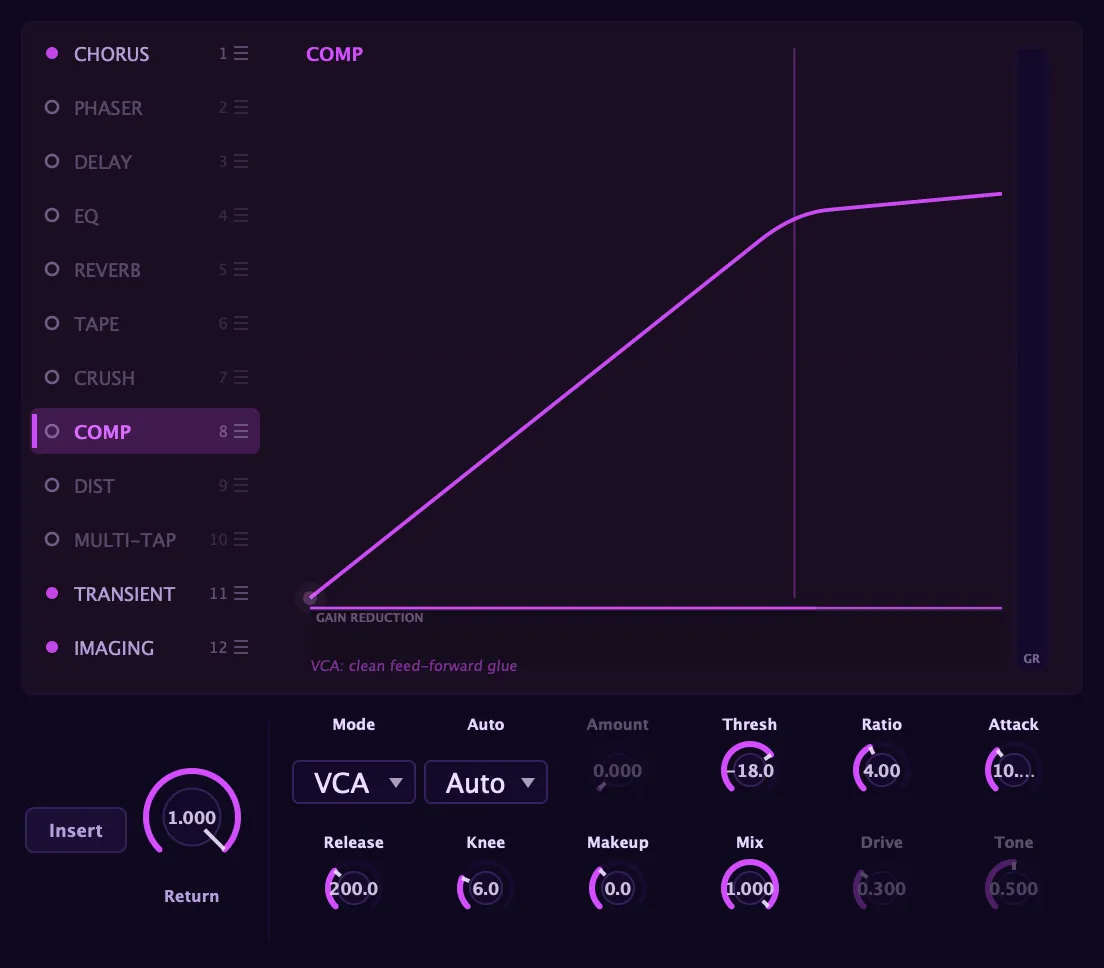
Four selectable compression modes, each a different circuit topology with its own ballistics and colour:
- VCA: clean feed-forward compression with no added harmonics. The fastest and most neutral mode; ideal for transparent bus glue and gain control without changing the sound’s character.
- FET: fast, feed-back compression in the style of the classic 1176 limiter. The gain-reduction circuit introduces saturation that increases with heavier compression, adding brightness and grip as the compressor works harder. Great on transient-heavy material.
- Opto: an opto-coupler style compressor with a fixed ~10 ms attack and a two-stage, program-dependent release. The release responds to the signal itself: it moves quickly for brief peaks, then settles slowly for sustained material. Warm and gentle, flattering on melodic content.
- Grit: a pumping, characterful mode that puts a real waveshaper in the gain path for distortion that varies with how hard the compressor is working. A single Amount knob scales threshold, ratio, drive, and makeup together, making it easy to go from light squeeze to heavily pumped saturation in one move. Tone tilts the compressed signal brighter or darker.
The hero visualisation shows a live gain-reduction meter alongside a transfer-curve plot with a moving dot that follows the operating point as you play, plus a scrolling gain-reduction trace, so you can see compression happening in real time rather than reacting to a static display.
Key controls: Mix, Mode (VCA / FET / Opto / Grit), Threshold, Ratio, Attack, Release, Knee, Makeup, Auto/Manual makeup, Amount (Grit), Drive (Grit), Tone (Grit).
Transient designer
Section titled “Transient designer”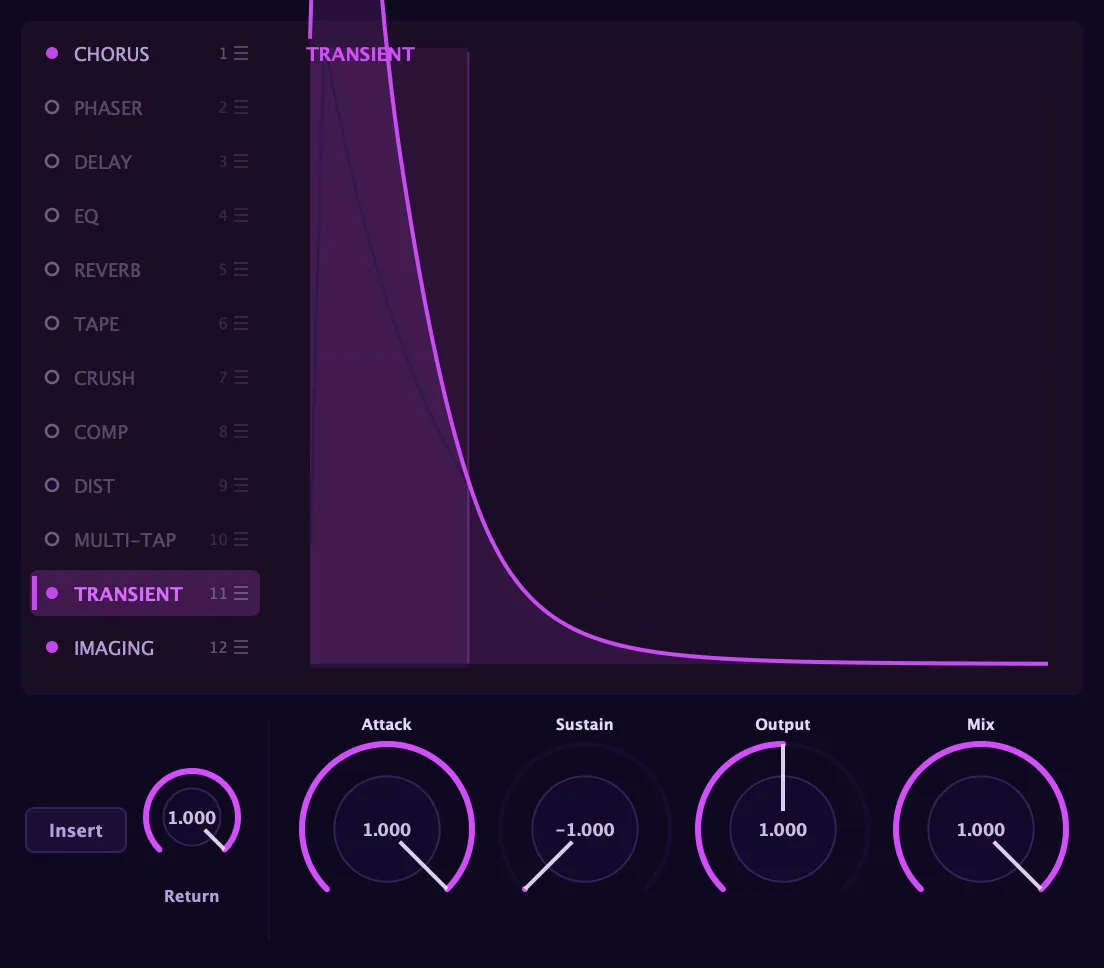
A threshold-free, frequency-conscious transient designer that reshapes a sound’s dynamic envelope with no gain-reduction threshold to set. It works by comparing a fast and a slow envelope of the signal, so it responds to the shape of each hit, not its level: a quiet note and a loud one of the same shape get the same treatment.
Three modes take you from broad to surgical:
- Single shapes the whole sound with one attack amount and one sustain amount. Attack controls the onset: push it toward punchier and transients sharpen and snap forward; pull it softer and the attack rounds off, blending into the texture. Sustain controls the body and tail: longer stretches the decay out, tighter shortens and tightens the body so the sound clears more quickly.
- Multi splits the signal into low, mid, and high bands and shapes each one independently, so an attack boost can snap the highs without dragging up low-end rumble, and a sustain move on the body doesn’t pump the top.
- Curve is the flagship no-knob mode: you draw the shaping per frequency.
The Curve editor — draw your transients. In Curve mode the panel hands the detail region to two side-by-side curves, TRANSIENT (warm) and SUSTAIN (cool). Each is a three-node curve, LOW / MID / HIGH, that you shape by dragging a node per band: raise the TRANSIENT curve at the lows to punch the kick, ease the HIGH band on the SUSTAIN curve to tame a ringing tail. There are no numeric knobs to chase: the curve is the control, and the node positions are the parameters, so a patch round-trips exactly.
The nodes are movable in frequency, not pinned: drag a node left or right to choose which frequency region it shapes, as well as up or down for how much. The three band centres are shared between the TRANSIENT and SUSTAIN curves, so moving a node’s frequency in one panel moves it in the other, keeping the two curves aligned.
Toggle each phase on or off. A small dot in the corner of each phase panel mutes just that phase’s shaping without deleting its curve: click the TRANSIENT dot to silence the attack shaping, the SUSTAIN dot to silence the sustain shaping. The curve stays visible and editable (the panel dims to show it is muted), so you can audition a sound with only the attack move, only the sustain move, or both.
Behind both curves runs a live waveform backdrop showing the real audio playing through the effect: you see the actual input alongside the actual shaped output and the difference between them, so you are shaping against what you hear, not a diagram.
Ballistics and output. A Speed control sets how snappy or smooth the shaping reacts: snappier catches sharp drum onsets, smoother suits sustained or already-dense material and avoids grit. Mix blends the shaped signal against the dry, and Output trims the makeup level at the end. A gentle output soft-clip can tame the peak rise an attack boost creates without a hard ceiling, and Pump ducks the body just after each onset so a transient pops from the body dropping rather than the peak rising: punch without raising level.
Both channels are shaped with the same gain so the stereo image never shifts. The transient designer works on plucks, mallets, percussion, drum loops, and any sound where you want to control how much of the attack vs. sustain reaches the listener, per frequency, without touching EQ or compression thresholds.
Key controls: Mode (Single / Multi / Curve), Attack (softer ↔ punchier), Sustain (tighter ↔ longer), per-band Transient / Sustain curve with movable band frequency + per-phase on/off (Curve mode), Speed, Pump, soft-clip, Mix, Output.
Parametric EQ
Section titled “Parametric EQ”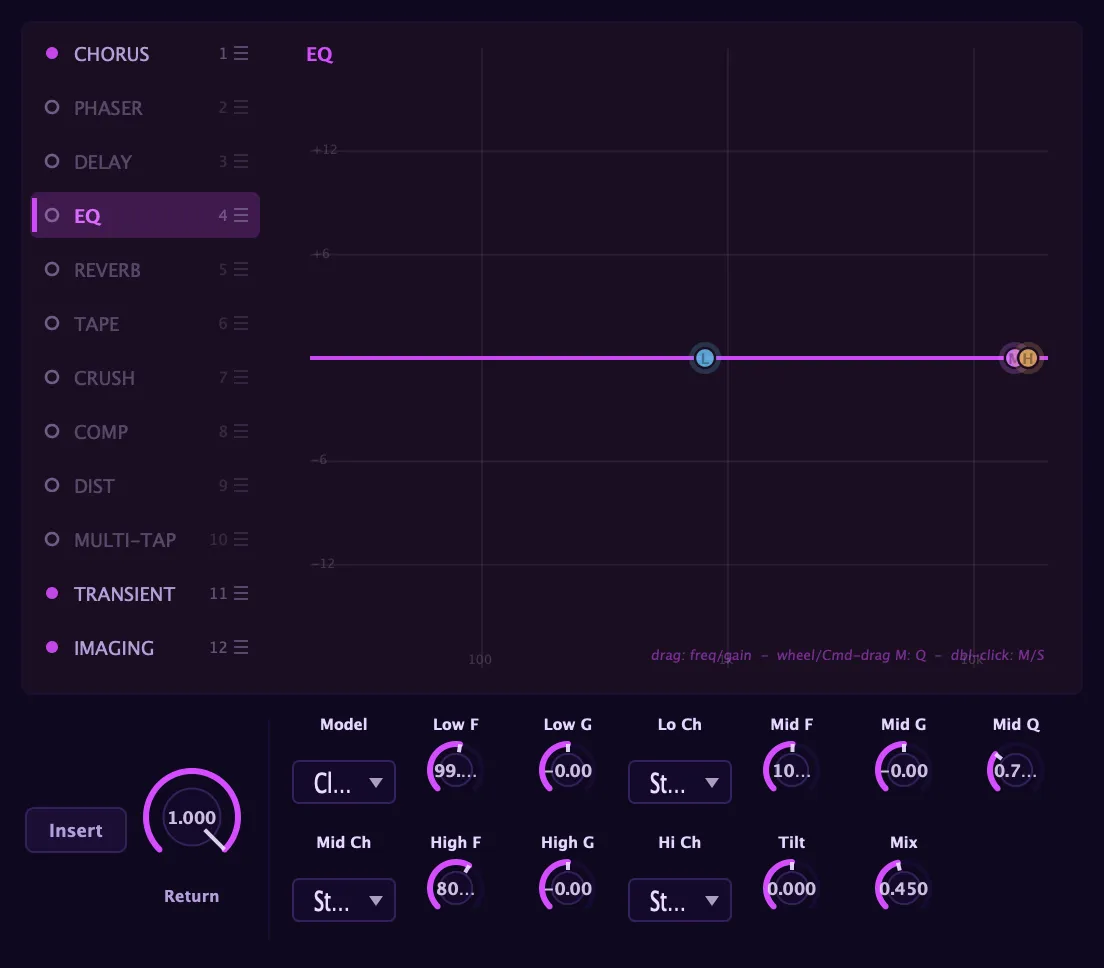
A six-band parametric EQ where every band is a full, type-selectable filter, plus a one-knob Tilt for a whole-patch brighter/darker sweep. Each band picks its own type: Bell, Low shelf, High shelf, High-pass, Low-pass, or Notch, so you can build any shape you need, from a couple of broad shelves to a surgical notch and a high-pass, without being locked to fixed band roles.
Per band you set Frequency, Gain (inert on the pass and notch types), Q (the bandwidth or slope), and an independent channel — Stereo, Mid, or Side — so you can, for example, tighten only the centre of the stereo field without touching the sides, or roll off the Side lows to firm up the low end. Each band has its own On switch, and any band left off or flat is a true bypass.
Each band also has a Monitor (headphone) and Mute toggle. Monitor solo-listens a band: while any band is monitored the EQ outputs only the monitored bands’ filtered signal, so you can hear exactly what a band is doing (monitor several and they sum). Mute drops a band from the summed response without changing its settings, so you can A/B a move in and out.
A Model colours the whole EQ with analog-accurate top-octave response (the high bands track the shape of a real analog EQ rather than the “cramped” digital one): Clean is a textbook transparent response (the exact clean reference), Console leans into classic mixing-desk character, and Passive evokes the famous passive program EQ where a broad boost and a nearby dip interact musically: the most coloured of the three.
Drive and Variance (subtle, optional, default off). Two controls add analog life on top of the curve, both off by default so a fresh EQ is transparent:
- Drive adds a gentle saturation whose character follows the model (Clean adds nothing, Console is subtle, Passive is the most coloured). It saturates per-band, so a boosted band drives harder than a flat one, the way a real analog EQ colours the frequencies you push.
- Variance adds a tiny, static left/right component tolerance, the channel-to- channel drift a real pair of analog channels always has. It is deliberately small: a touch of width and life, never an obvious effect.
The no-knob editor — the curve is the control. The EQ has no rows of knobs. The response curve itself is what you touch: drag a node to move a band’s frequency and gain together, scroll over it to widen or tighten its Q, and click a band to focus it. Behind the curve runs a live spectrum analyser showing the real signal, with input and output meters down the sides, so you EQ against what is actually playing.
The EQ shows a compact editor right in the FX slot for quick moves, and that same editor expands into a larger, resizable popout for detailed work, giving the curve, spectrum, and every band room to breathe without leaving the effect.
Key controls: Mix, Model (Clean / Console / Passive), Tilt, Drive, Variance, and per band: Type (Bell / Low shelf / High shelf / High-pass / Low-pass / Notch), Frequency, Gain, Q, Channel (Stereo / Mid / Side), On, Monitor, Mute.
Stereo imager
Section titled “Stereo imager”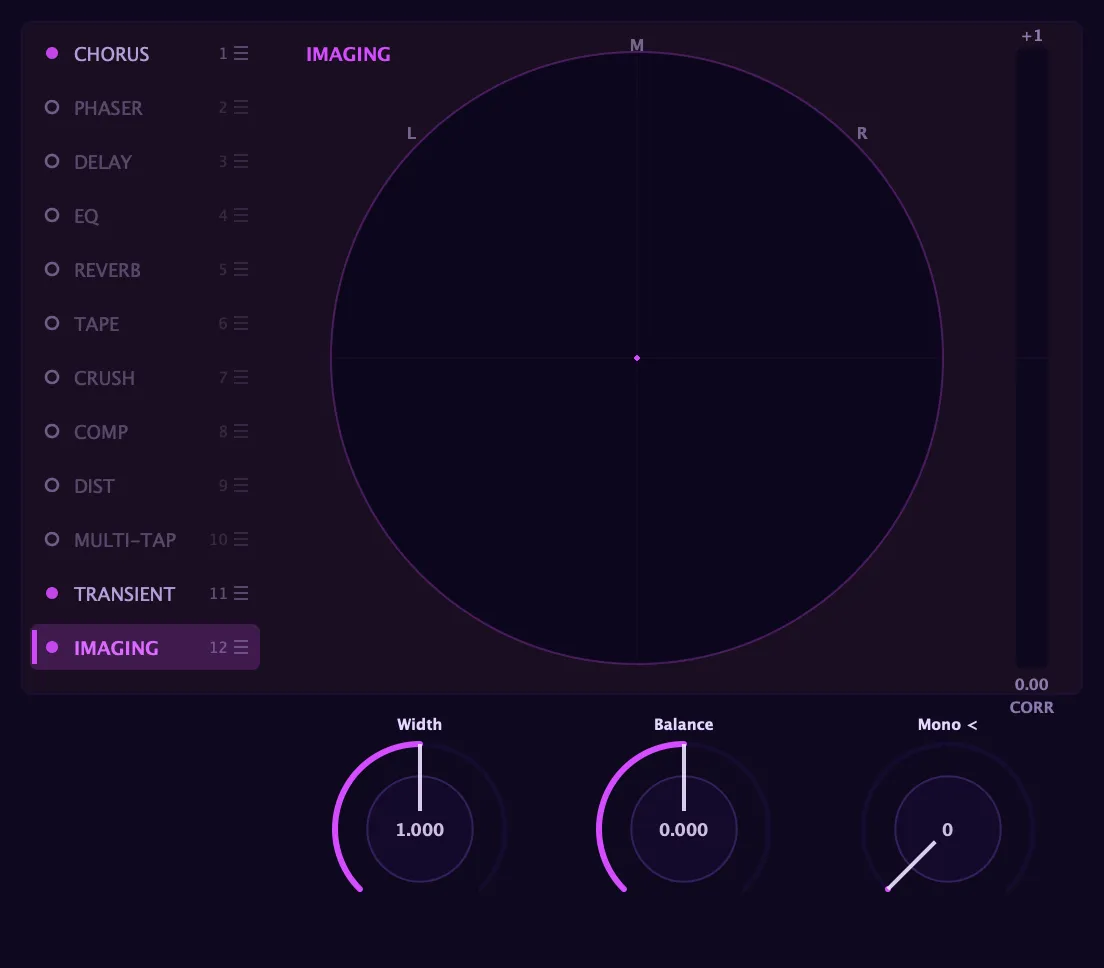
Width and image control for the final output, almost always the last slot in the chain, shaping the finished mix rather than feeding into further effects.
Width narrows or widens the side signal. At centre it is unity; pull it below centre to mono; push it above to exaggerate the stereo spread. Balance shifts energy between the centre (mid) and the sides without changing Width, useful for correcting a mix that is too centred or too diffuse. Mono< is a bass-mono crossover: below the set frequency, the signal is summed to mono, keeping kick and bass centred and solid in mono playback while the top end remains wide.
The hero visualisation is a live goniometer (the classic X–Y stereo scope) with a correlation meter below it. A perfectly mono signal draws a vertical line; a wide stereo signal fills a broad ellipse; out-of-phase content appears as a horizontal smear. The correlation meter gives a quick numeric read of how compatible the signal is with mono playback.
This effect is insert-only: it cannot run as a send/return.
Key controls: Width, Balance, Mono<.
The voice-path waveshaper
Section titled “The voice-path waveshaper”The waveshaper is not a rack effect; it lives inside each voice, in the signal path around the filter, and processes audio per voice before the amp stage. It is documented here because it is the main distortion tool that works at the voice level, distinct from the rack’s Distortion slot (which processes the post-mix stereo bus) and the master-band saturation (which applies to the final output).
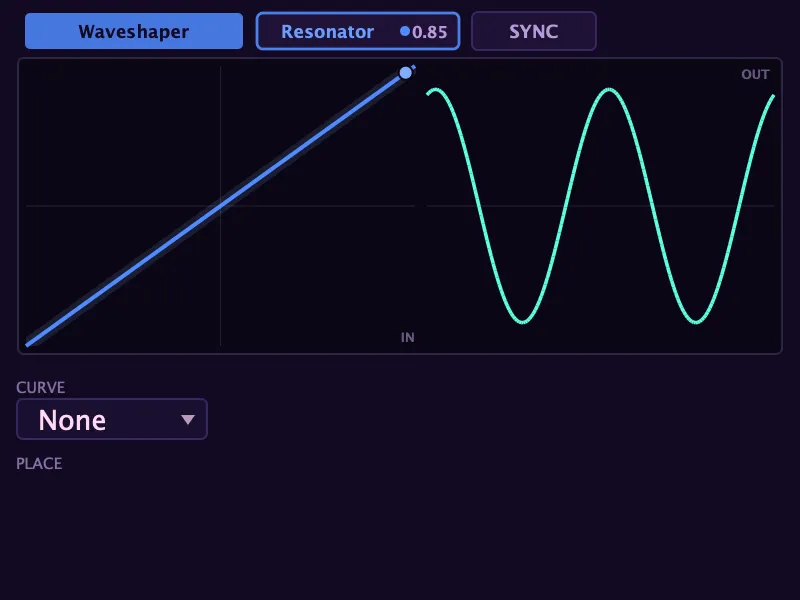
The waveshaper adds harmonics by passing the voice signal through a fixed transfer curve, from gentle saturation to hard clipping, wavefolding, and a fully hand-drawn shape.
Placement around the filter. A Place selector sets where in the signal path the waveshaper sits:
- Pre-filter: the waveshaper distorts the raw oscillator mix before the filter carves it. Sweeping the filter then sweeps which generated harmonics survive: a bright, aggressive “distort then EQ” placement.
- Post-filter: after the filter (the default). The filter shapes the waveform first, including its resonant peak, then the waveshaper distorts the result. This makes resonance sing and self-compress, and tames near-self-oscillation, the classic “synth scream” placement.
- Mid-filter: between the two filters in Serial routing. The first filter pre-shapes, the waveshaper distorts, the second filter post-carves. In routings without a clean between-filter slot it falls back to Post-filter.
Curves. A Curve selector chooses the transfer shape:
| Curve | Character |
|---|---|
| None | Pure passthrough; the waveshaper is inert and all controls step aside. |
| Soft | Gentle rational soft-clip: subtle warmth and thickening. |
| Tanh | Smooth symmetric saturation: classic overdrive that rounds the peaks. |
| Hard Clip | Brick-wall clip: aggressive, buzzy, rich in odd harmonics. |
| Cubic | Polynomial soft-knee: musical drive between Soft and Hard. |
| Sine | Saturates, then folds once the input passes its peak: hollow, wavefolder-lite, adds upper partials. |
| Fold | Triangle wavefolder: metallic, West-Coast timbres, harmonics that brighten with drive. |
| Asym | Asymmetric curve with a Bias control: even harmonics, tube-like colour. |
| Draw | A fully hand-drawn transfer curve: any shape you draw becomes the waveshaping function. |
Peaks stay level-matched as you push harder, so switching curve or raising drive does not jump the loudness.
Trim is a pre-curve input trim: it sets how hot the signal arrives at the curve before Drive takes over. Because Trim sits ahead of the curve and Drive controls how deep into it you push, you can stage a clean input level for the curve independently of how much harmonic character Drive adds, useful when the incoming oscillator level varies between patches or scenes.
The hard-edged curves (Hard Clip, Cubic, Fold, and any drawn curve) are anti-aliased, and the voice can run at higher quality for extra headroom on extreme settings. The asymmetric and folding curves are DC-cleaned so an offset never builds up, even at high drive levels.
Key controls: Curve, Place (Pre-filter / Post-filter / Mid-filter), Drive, Mix, Trim, Bias (Asym curve only).
The Draw curve. Selecting Draw turns the waveshaper’s display into an interactive transfer-curve editor. A live waveform preview shows how the curve transforms the signal in real time, and a dot rides the curve to show the input-to-output mapping as audio passes through. You build the curve with breakpoints: add them by clicking, drag them to reshape, double-click to remove. Drawing tools:
- Sym: locks odd symmetry so both halves of the curve mirror each other; you only need to draw one side.
- Spline: smooth curve segments between breakpoints, rather than straight piecewise segments.
- Snap: snaps breakpoints to a grid for clean, deliberate shapes.
- Reset: returns the curve to the identity line (a straight diagonal, no shaping) so you can start fresh.
The drawn shape is saved with the patch and is per-scene — each scene has its own drawable transfer curve, so Scene B’s Draw shape is independent of Scene A’s (edit it with the Waveshaper open while editing Scene B). The same drawing interface appears for drawable LFOs, envelope contours, step-sequencer Curve Lanes, and the Performer, so the feel is consistent everywhere a curve can be hand-drawn in Aconite.
String oscillator note. The voice-path waveshaper is separate from the String oscillator’s own in-loop drive. That means a plucked String can be coloured at its source (shaping the attack and the body of the string model itself) and then shaped again downstream by the waveshaper, stacking into a full electric-string chain without the two stages interfering with each other.
The Sympathetic Resonator
Section titled “The Sympathetic Resonator”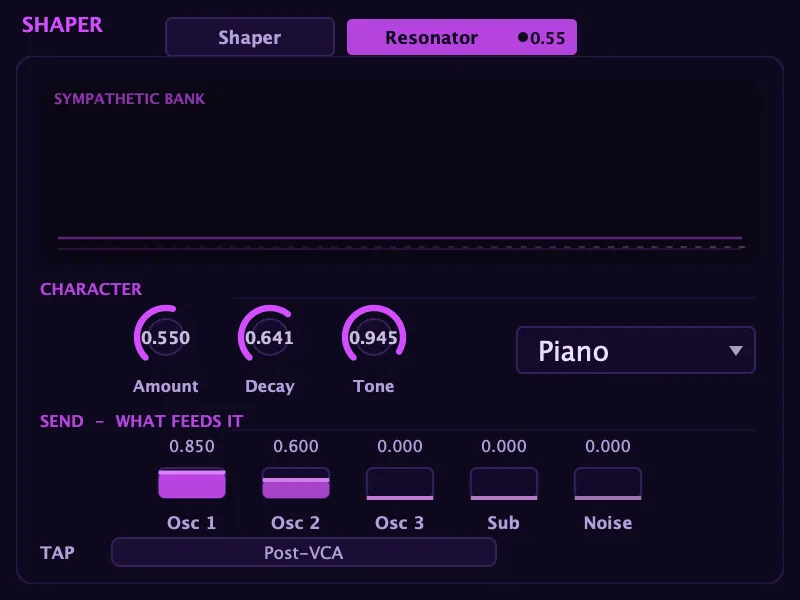
The waveshaper’s panel is a two-page deck: a Waveshaper | Resonator tab strip at the top swaps its control surface between the drawable waveshaper (above) and the Sympathetic Resonator. Both stages keep running; the tab only changes which one you are looking at. The Resonator is a bank of undamped tuned strings that ring in sympathy with the notes you play, the way a real piano’s unplayed strings sing along when you hold the sustain pedal, or a sitar’s drone strings buzz under the melody.
It is worth being clear about what this is not. It is not reverb. A reverb models the room around an instrument (extrinsic space); the Resonator models the instrument’s own undamped strings ringing (intrinsic body). A real piano wants both, and they sit in different places: the Resonator completes a physical-model instrument, adding the “the whole instrument sings” halo that a dry pluck or strike never has, while reverb adds the space it sits in. Used on the String, Modal, or Kick voices it is the last piece that makes a modelled instrument read as real rather than synthetic.
The character knobs.
- Amount: how much the resonator bank rings, from silent (0, the bank is effectively off) up to a rich, blooming sympathetic halo. This is the master control: at 0 the Resonator is inert no matter what else is set. This same level also appears as the RESO fader on the right of the mixer, so you can set how much resonance is in the sound right there at the mix stage. The two are one control: move either and the other follows. The RESO fader also has an M that mutes the whole resonance instantly without changing the level, so you can flip it in and out to hear exactly what it is adding, then bring it back at the same setting.
- Decay: how long the undamped strings ring on, from a short, tight shimmer to a long, singing sustain that hangs under the notes you play.
- Tone: the colour of the ringing, from a dark, woody halo to a bright, metallic one.
Model. A selector picks the tuning of the resonator bank, which is what gives it its character:
- Piano: the undamped strings of a grand piano, the “whole piano sings” pedal-down bloom.
- Duplex: the fine, high, metallic shimmer of a piano’s behind-the-bridge string segments, undamped by design.
- Tanpura: the buzzing sustained drone of the Indian tanpura, a low continuous wash under whatever you play.
- Sitar: the sitar’s bank of sympathetic strings buzzing under the melody line.
- Harp: open, undamped harp strings ringing together.
- Free: instead of a fixed tuning, the bank tracks the notes you are actually holding, exactly like a real piano’s undamped strings. Hold a chord (or the sustain pedal) and those pitches ring in sympathy; release them and they damp. This is the most piano-realistic mode, because the sympathetic set follows your hands.
The send mixer. A five-fader strip (Osc 1, Osc 2, Osc 3, Sub, Noise) sets how much of each source feeds the resonator bank. This is what makes the effect model-coupled rather than a wash across the whole mix: you feed the resonator from the String or Modal oscillator that should be exciting the sympathetic strings, and leave the rest out. Turn up the send from the source you want the bank to listen to.
Tap. A Post-VCA / Pre-filter switch chooses where the bank taps the voice. Post-VCA (the default) is the cleaner, more reverb-like feed taken after the amp. Pre-filter feeds the raw pre-filter signal into the bank, which is the model-coupled placement that most convincingly earns the “the instrument itself is ringing” realism, because the sympathetic strings hear the source the same way the played string does.